


Featured Collections
-

Chandelier
-

Pendant Lamp
-

Table Lamp
-

Floor Lamp
-

Wall Lamp
-

Ceiling Lamp
-

Mirror Lamp
-

Ceiling Fan Light
-

Outdoor Lamp


Lomance
What is Lomance? It is more than a lamp — it is a way of living, an expression of aesthetic sensibility. We believe that light does more than illuminate; it is the poetic footnote to everyday life. Ustinianlight awakens the soul of a space with every soft glow, allowing light and shadow to breathe emotion into each corner.
Featured Spaces
-

Living Room
-

Bedroom
-

Dining Room
-

Kitchen Lighting
-

Bathroom
-

Corridor
-

Hallway
-

Balcony
-

Entrway
-

Study
-

Hotel
-

Studio


Light Shapes the Space
Thoughtfully crafted lighting that enhances atmosphere, balance, and everyday comfort.

Elevated by Light
Soft illumination that enhances spatial flow and refines everyday architecture.
-
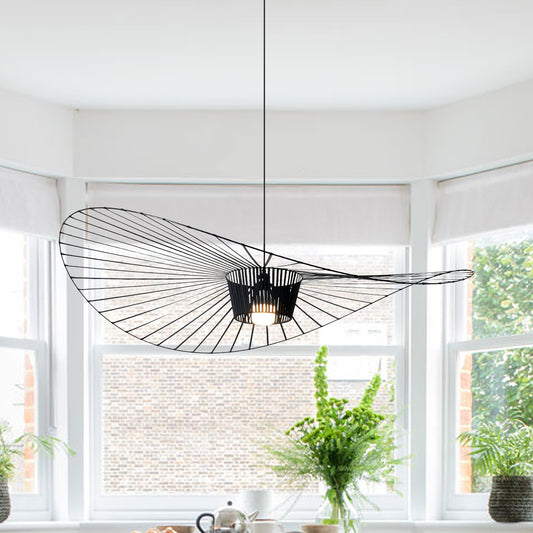
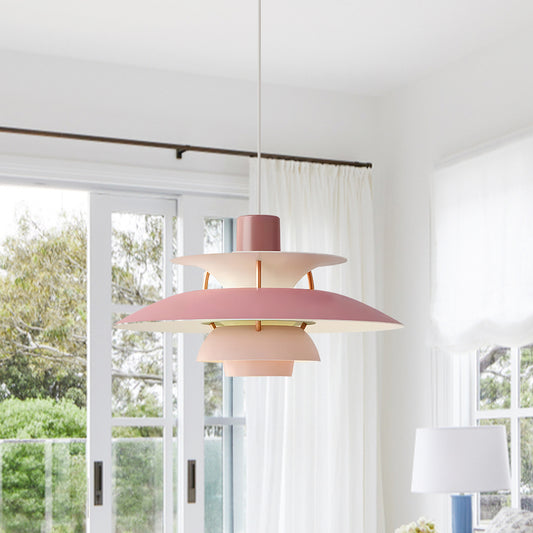
French Straw Hat Pendant
Regular price From $168.00 USDRegular priceUnit price per -
Bud Table Lamp
Regular price $246.00 USDRegular priceUnit price per -
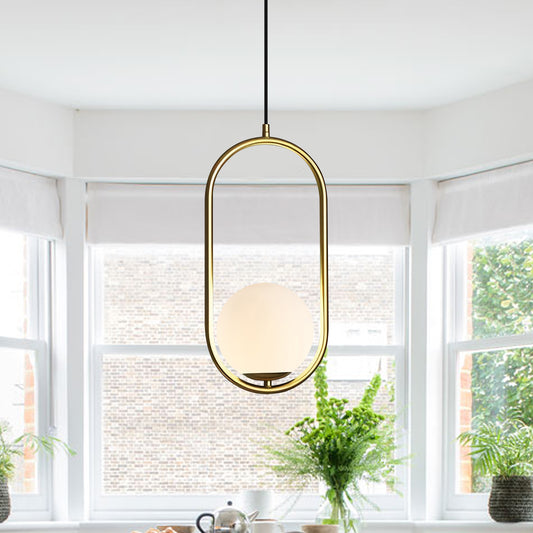
Mila Glass Pendant Lamp
Regular price From $84.00 USDRegular priceUnit price per -
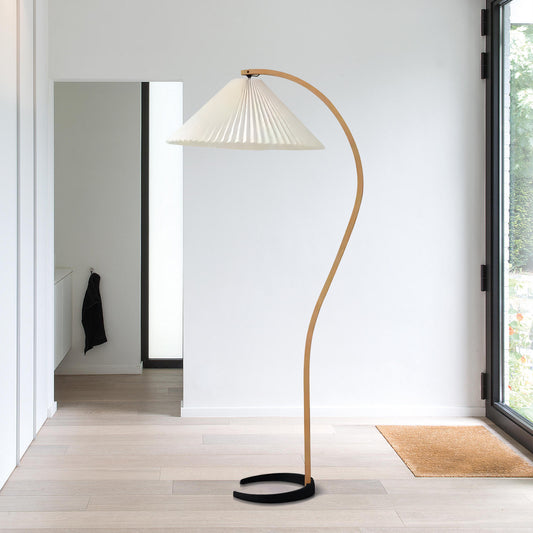
Pleated Floor Lamp
Regular price $448.00 USDRegular priceUnit price per$896.00 USD$448.00 USD -
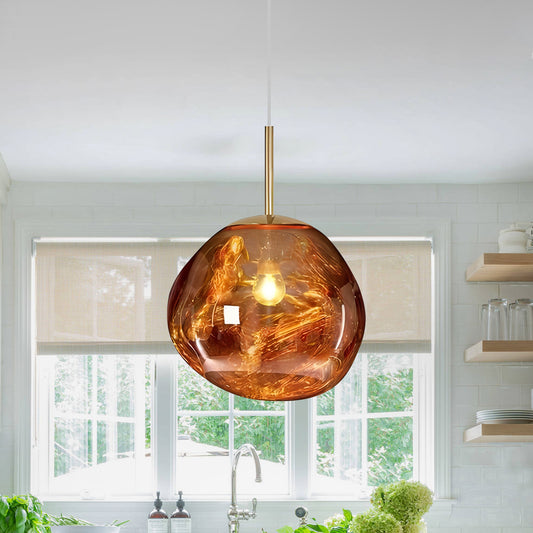
Lava Pendant Lamp
Regular price From $98.00 USDRegular priceUnit price per$0.00 USDFrom $98.00 USD -
Danish Arc Pendant Lamp
Regular price From $218.00 USDRegular priceUnit price per -
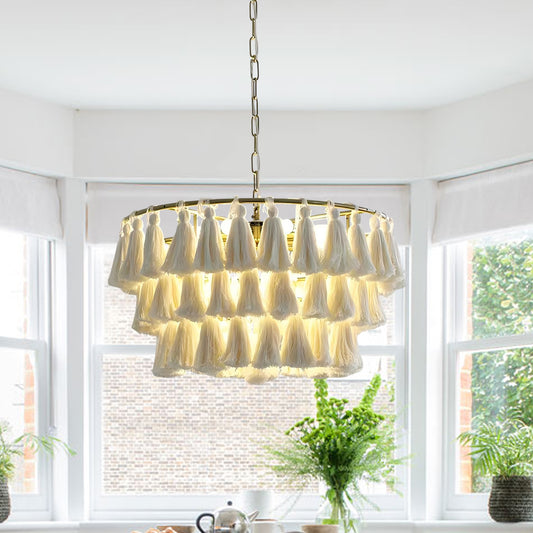
Bohemian Tassel Chandelier
Regular price From $235.00 USDRegular priceUnit price per$0.00 USDFrom $235.00 USD -
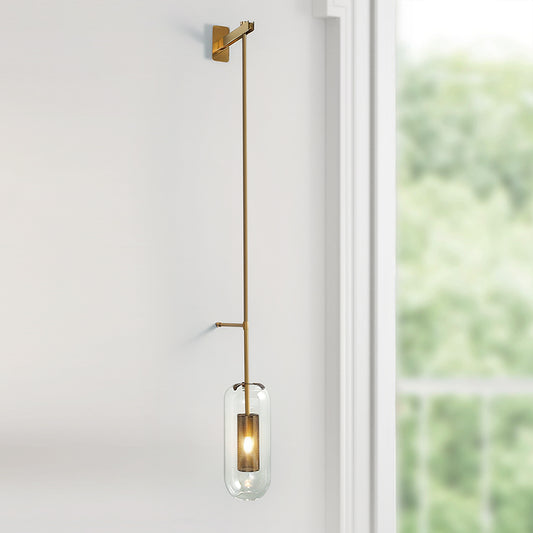
Danmore Wall Lamp
Regular price From $152.00 USDRegular priceUnit price per$0.00 USDFrom $152.00 USD


Featured Spaces
-

Iron Lamps
-

Glass Lamps
-

Crystal Lamps
-

Acrylic & Plastic Lamps
-

Ceramic Lamps
-

Alabaster Lamps
-

Travertine Lamps
-

Bamboo Lamps
-

Marble Lamps
-

Wood Lamps
-

Silk & Paper Lamps
-


Glass Craftsmanship
Glass components are shaped through controlled heating and forming techniques to achieve clarity, balance, and smooth contours. Subtle textures and natural variations enhance light diffusion, resulting in fixtures that feel light, refined, and visually clean.

Forged Craftsmanship
Metal elements are forged and refined to ensure structural integrity and precise form. Through shaping, welding, and finishing, the material gains strength while maintaining elegant proportions and tactile depth.

Die-Casting Craftsmanship
Metal components are formed through high-pressure die-casting to achieve precise dimensions and consistent structure. This process ensures durability, smooth surfaces, and reliable performance across each fixture.

Alabaster Craftsmanship
Natural alabaster is carefully cut and polished to preserve its unique veining and soft translucency. When illuminated, the stone diffuses light evenly, creating a warm and calming glow. Each piece reveals subtle variations, making every fixture one of a kind.

Weaving Craftsmanship
Natural materials are carefully woven by skilled artisans to create breathable structures and organic textures. The woven forms soften light and add warmth, bringing a sense of rhythm and natural balance to the space.

Excellent Service
-

Free Shipping
Enjoy free shipping in eligible regions
-

Support
Here to help when needed
-

30-Day Returns
Returns accepted within 30 days
-

Secure Payment
Safe checkout options
Lighting Guides
Care Instructions
🧹 Product Maintenance Instructions
Daily Cleaning:
For daily cleaning, you can use a feather duster to remove dust through static electricity, making it easy to wipe away light dust.
1. Ceiling Lights and Chandeliers:
Ceiling lights and chandeliers are typically installed high up, making them hard to disassemble. Follow these steps for cleaning:
-
Cleaning Method:
-
Use a feather duster to gently remove surface dust.
-
You can also spray a cleaning agent on the light surface, let it sit for 5 minutes to soften any dirt, and then wipe it off with a soft cloth.
-
2. Floor Lamps:
Floor lamps often accumulate dirt on the base, so regular cleaning is important:
-
Cleaning Method:
-
Use a soft cloth with a little cleaning agent to wipe the base of the floor lamp.
-
For cleaning the lampshade, apply the special cleaning agent on a soft cloth first and then wipe the lampshade clean.
-
3. Table Lamps:
Table lamp bases and lampshades need special attention:
-
Cleaning Method:
-
First, remove dust from the surface of the base with a clean cloth.
-
Then, apply a cleaning agent containing metal polish to a soft cloth and wipe down the metal parts of the table lamp.
-
4. Spotlights and Wall Lights:
For cleaning spotlights and wall lights mounted high up, ensure safety first:
-
Cleaning Method:
-
Disconnect the power supply to avoid electric shock.
-
Use a dry cloth to wipe the surface of the light fixture, avoiding overly damp cloths or cleaners.
-
If you need to use cleaning solutions, ensure the cloth is wrung out almost dry to avoid liquid residue.
-
Lamp Shade Cleaning Tips:
Plastic and Metal Lamp Shades:
-
Dampen a cloth with an all-purpose cleaner and gently wipe the dirt from the lamp shade.
-
Wipe off any remaining cleaning agent with a dry cloth.
-
Finally, use a clean, dry cloth to give it a final wipe, ensuring it’s shiny.
Acrylic Lamp Shades:
-
Use a soft cloth, such as flannel, to gently wipe away dust from the acrylic lamp shade.
-
Afterward, wipe with a clean dry cloth to remove any remaining dust.
Fabric and Paper Lamp Shades:
-
First, use an anti-static duster cloth to remove dust.
-
Then, wipe away dirt with a soft cloth to ensure the lampshade is clean.
Material-Specific Cleaning Instructions:
Copper Lights:
-
Use a soft cloth dampened with a specialized cleaner to wipe down the surface of copper chandeliers.
-
Avoid using too much cleaner, and clean gently to avoid damaging the copper surface.
Glass Lights:
-
Use a soft cloth dampened with diluted glass cleaner to gently clean the glass surface, ensuring no watermarks are left behind.
-
For stubborn stains, you can use a soft-bristled brush, but be careful not to scratch the surface.
Important Notes:
-
Before cleaning, make sure the light fixture is completely disconnected from the power source.
-
When using cleaning agents, avoid spraying liquids directly onto the fixture. Instead, use a soft cloth to gently wipe the surface.
-
For stubborn dirt, consider using specialized cleaners but avoid harsh chemicals like strong acids or bases.
By regularly cleaning and maintaining your lighting fixtures properly, you can ensure they continue to look great and function well for years to come. If you have any questions or concerns, feel free to contact us at any time!
How to Choose Lighting
How to Choose Lighting for Arched/Sloped/Vaulted Ceilings
Vaulted or arched ceilings can create a stunning focal point in any room, making the space feel larger and more open. With the right lighting fixtures, you can make the most of this architectural feature and enhance the ambiance of the room.
Recessed Lighting
Although most ceiling lights are designed for flat ceilings, most fixtures can be adapted for sloped ceilings with the right adapter. Recessed lighting requires special housings designed for slanted ceilings to ensure the light shines straight down, rather than at an angle. When purchasing housings for sloped ceilings, ensure they can be adjusted to accommodate the ceiling’s angle. You should also pair the housing with an adjustable trim. To direct the light exactly where you want it, you can even purchase specialized trims, such as eyeball trims, which have a rotating feature to adjust the angle of the bulb within the housing.
Pendant Lights
If your ceiling is vaulted, the ideal hanging position for a pendant light is at the central beam. However, if you want to hang a pendant light on a slope or fully slanted ceiling, there are specific ways to go about it. Pendant lights with a flexible cable or chain can easily be hung from a slanted ceiling since the cable remains vertical once the ceiling canopy is attached. If your pendant light hangs from a solid rod, rigid suspension, or similar fixture, you may need to modify the installation using a sloped ceiling canopy, allowing the pendant to hang vertically from the angled ceiling.
Track Lighting
Track lighting is a popular solution for sloped ceilings. Installing multiple light sources on a single track increases lighting levels and provides better control over each light’s direction. Each bulb is mounted on an adjustable "head" that can be aimed at any angle where light is needed. The track is anchored to the ceiling using ceiling mounting hardware, and a special sloped ceiling bracket is required for installation on angled ceilings.
Wall Sconces
Wall sconces (or wall lights) serve as a bridge between ceiling and furniture lighting. They should be placed roughly one-third of the way up from the floor to eye level or higher on the wall. Wall sconces not only direct light downward but can also direct light upward, which is especially effective for accentuating the height and beauty of vaulted ceilings. Using upward-facing sconces will highlight the ceiling’s architectural features and further enhance the room’s aesthetic appeal.
Skylights
Installing skylights on the slope of a vaulted ceiling is a great way to brighten the space, as this area can become quite dark. Not to mention, skylights allow you to take full advantage of free natural sunlight throughout the day without the need to replace bulbs, all while lowering energy bills and reducing environmental impact. However, sloped ceilings still require additional artificial lighting during nighttime, adverse weather, or even during the day to properly illuminate tasks or activities.
Layered Lighting for Vaulted Ceilings
Ultimately, selecting a single lighting fixture for any space is rarely enough. When adding lighting to any room, especially those with vaulted ceilings, it’s best to approach the lighting plan with a layered method. While using recessed lighting on the slope and hanging a pendant light on the central beam is a popular lighting combination, track, wall, and skylight lighting can also help ensure your room is evenly illuminated.
By ensuring that both the vaulted ceiling and the rest of the room are comfortably lit, and by properly installing your lighting fixtures, you can enjoy a bright, beautiful vaulted ceiling room.
How Do Dimmer Switches Work
Dimmer Switches:
Lighting is crucial when arranging a home. The level of light in a room determines what you can and cannot do, and it significantly affects your mood. For example, you can’t easily read by candlelight, and a romantic dinner for two under 1,500 watts of halogen lighting may not feel as romantic. The challenge is that people often need rooms to serve multiple functions, and each function requires a different level of lighting. This is where dimmer switches come in. A dimmer switch is a convenient electrical component that allows you to adjust the light level from nearly dark to fully bright with just a turn of a knob or a slide of a control bar.
However, not all light bulbs are compatible with dimmer switches. The dimmer switch works by regulating the voltage rather than the wattage. If the dimmer switch is not properly matched with the bulb, it can supply the wrong voltage to certain bulbs, causing issues.
Incandescent and Halogen Bulbs:
Incandescent bulbs and their close relative, halogen bulbs, are the most practical options because they work with any dimmer switch. These bulbs only burn out when the voltage is too high; they do not burn out when the voltage falls below their capacity. This makes them compatible with most dimmer switches, offering versatility and ease of use.
Fluorescent Bulbs:
To use a dimmer with fluorescent bulbs, the bulbs must have a dimmable ballast. Additionally, consumers should purchase dimmer switches that are specifically labeled as compatible with fluorescent lighting. Even with dimmable fluorescent bulbs, these lights may flicker or fail to operate at lower brightness settings. One common issue is that when using one or more dimmers in different locations, they may not turn on correctly, leading to malfunction.
LED Bulbs:
LED bulbs are generally dimmer than fluorescent bulbs, but their dimming range is controlled by the circuitry within the bulb. LEDs, like fluorescents, may shut off or flicker at lower brightness levels. They also may not work properly with certain dimmer switches, especially if multiple dimmers are in use. While incandescent bulbs can be dimmed from 0% to 100% of their brightness, fluorescent and LED lights typically can only be dimmed to a minimum level of around 10% to 20%. Therefore, homeowners may not be able to achieve the exact atmosphere they desire with these bulbs.
Additionally, fluorescent and LED bulbs require more expensive and specialized dimmer switches. However, in the long run, LED and fluorescent lights can provide significant energy savings, making them an environmentally friendly and cost-effective choice.
How to Adjust the Length of Cables
For Cables (or Wires):
-
Determine Installation Position and Final Hanging Height: Before adjusting the cable length, first decide where you want to install the light fixture and the final height at which it will hang. This will help you gauge how much length you need.
-
Adjusting the Cable: After mounting the ceiling fixture, simply trim the cable to the desired length. Be sure to leave a little extra length to ensure the power wire can be properly connected to the electrical source.
Note: Always check the cable length twice to avoid cutting it too short. It's better to leave a bit more than needed for flexibility during installation.
For Steel Wire:
-
Adjusting the Length: Most steel wires pass through a small pin on the ceiling. To adjust the length:
-
Shorten the Wire: Press the pin to retract the wire into the ceiling, effectively shortening the length.
-
Lengthen the Wire: Pull the wire out to extend its length, ensuring you stay within the appropriate range.
-
-
Trimming Excess: If you’re shortening the wire, you can also choose to cut off any excess steel wire at the ceiling end for a cleaner look.
For Chains:
-
Determine New Length: Decide the new length for the chain from the ceiling and which link will be the final one. Measure and mark the position where you want the chain to end.
-
Removing Unnecessary Links: Using pliers, grasp one half of the link, and with a second pair of pliers or an adjustable wrench, twist the other half of the link to separate it. Remove the extra chain sections you don’t need.
-
Measuring and Adjusting: Measure the chain on the chandelier to ensure you are cutting off the right amount of links. You may want to cover the chain with a cloth to protect its surface from damage during the process.
-
Length of Cable/Wire in Relation to the Chain: After shortening the chain, trim the chandelier cable/wire so it is 12 to 24 inches longer than the chain. This ensures enough wire to pass through the links for proper connection.
-
Personal Preference: Some people prefer to thread the cable through every other link of the chain, though this is a matter of personal preference and aesthetic choice.
By following these steps, you can efficiently adjust the length of cables, wires, or chains to fit your installation needs while maintaining a clean and professional appearance for your lighting fixtures.